By Nico Laudenberg
Feb 21, 2021
“I give myself permission to just make for the sake of making without any thought to the outcome, which can be surprisingly hard. … What I would tell my younger self is this: There is no “right” way to make art. The only wrong is in not trying, not doing.
Don’t put barriers up that aren’t there — just get to work and make something.“
Lisa Golightly (painter)
How are you?
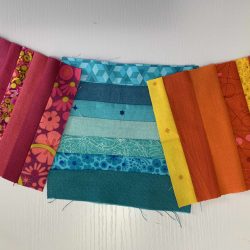
Did you decide which fabrics will be “the chosen ones” for your quilt? Congrats! We hope you enjoyed the process. Let’s make these fabrics into something even more beautiful.
This week’s task
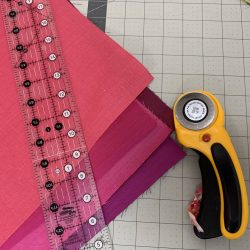
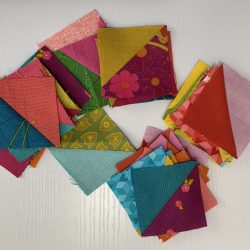
Now that you have your fabrics, we recommend to cut them all in little pieces! Of course we do.
There are three different options to do so:
- Follow the instructions in your pattern
If you work with fat quarters, it is smart to stick with Elizabeth Hartman’s cutting directions. She shows how to make the best use of the fat quarters by arranging all needed pieces correctly. This method works well and is the most efficient one if you know exactly which fabric should go where. - Cut your fabrics for each row
If you want more control over what goes where and decide about your use of fabric more deliberately, you can use our re-written instructions. They are broken down and sorted by blocks, so you can choose to work with scraps and/or row by row. This is only available to those that have registered for the QAL. You can register here anytime! - Go bonkers: Improvise
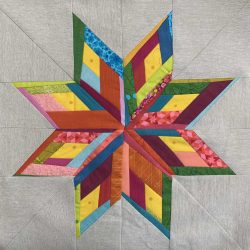
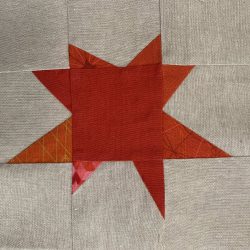
We announced it from day one: This quilt has potential to be done freestyle, that’s one reason we chose it. Some don’t like being super precise, are intimidated or annoyed by so much accuracy like in the star of the center medallion… so let’s do it wonky. We substituted all precise blocks with improv blocks. Because – why not? As long as you stay in the given outer measurements of each block, you can fill them with whatever you want. Do them all wonky, just some of them – you choose! Scroll down to the bottom to find the details in the second set of instructions at the end of this blog post.
Some tips
- Find useful information on cutting and organizing your fabric pieces in Elizabeth’s tip sheet which is only available to those that have registered for the QAL. You can register here
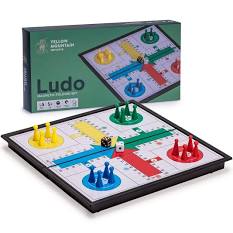 Verena Heyer has this amazing idea for us: Use a Ludo man (well, or any other like shaped thing), glue it on your self-made template as a grip for a better hold.
- FYI – Ludo is a classical board game in Germany, it‘s called Mensch ärgere dich nicht (Hey, buddy, don‘t get mad!)
- If you are the proud owner of the fancy “Stripology”-ruler or alike: this is the time to make the best use of it! Not only are the long strips for the background borders cut in a breeze, it’s also a good helper to cut the diamonds for the center star. Don’t worry too much: It’s only 72 pieces for the medallion, that’s doable whatever way you cut them.
- Keep the scraps, as a back up if you need to re-do something, but you also might want to use them in the backing or for matching pillows.
- Cutting several layers? Treat yourself with a new blade
- Self-made Iron Aid Mix
- 700 ml distilled water
- 100 ml Vodka
- optional: a teaspoon of essential oil – There you go!
- Starching: yes or no? Read here for more on this much discussed topic: Teresa Coates – Starch and starch alternatives
- Find a lot of helpful hints on Charlotte Noll’s page about precision cutting
- Or you might want to see this: Jen Shaffer – Ways to stop your ruler from slipping while cutting
What’s next?
First, you need to decide which way you want to go – follow the original instruction, go row by row or improvisational. And then you are going to have a week ahead full of fun cutting your fabrics. We have no more tasks for you than: Never leave your rotary cutter open!
And next Sunday we will send new information and start putting together the center medallion.
Show what you are doing on social media, meet your mates in our private Facebook group, keep posting on Instagram with #gaaqgqal and enjoy yourselves!
Not comfortable with Instagram yet? Need a little refresher? Find our Instagram slideshow here: Instagram Tutorial
Do you want more and meet some of your fellow quilt-alongers live? Let us know – socialmedia@gaaqg.com, we’re happy to set up a Zoom meeting to hang and chat together!
Stay warm,
Gena Loyd, Nico Laudenberg, and Nancy Frye
Reach out and connect:
Email: socialmedia@gaaqg.com
Instagram: @gaaqg
Hashtag: #gaaqgqal
Facebook group: https://www.facebook.com/groups/1049612052185500
Improv Instructions: Go Bonkers
You don’t like the pressure of matching points? Or even rulers? We got you covered – let’s improvise! Here are some alternative blocks Nico has created. We’ll add some instructions to the newsletters that come with the different blocks in the next weeks, but here is a sneak preview so you know what/how to cut in case you want to go bonkers, too! And don’t forget: These are just suggestions – there are so many more ideas of what you could do.
Skew Star Center Medallion
– Colorful fabrics
8 x diamonds, approximately shaped like #1 template (no need to be exact)
strips with different width, no further measuring needed
– Background fabric
8x 6’’ triangles (= 4x 6’’ squares, cut in half diagonally)
8x 7’’ triangles (= 4x 7’’ squares, cut in half diagonally)
Eye-balled Half-Square Triangles
Make 32 blocks à 2-1/2’’
Use neutrals, grays or colorful fabrics,
cut either 64 triangle-ish pieces or 32 approximately 3’’-squares
Rickety Rail Fences
Make 20 blocks à 5-1/2’’ square (5’’ square finished)
Use colorful fabrics, cut
– strips (app 6’’ long) of random width (vary the width, anything up to 5-1/2’’ goes) and sew them together until you can square the block to 5-1/2’’
Shaky Stars (instead of the Crosses)
Make 20 blocks à 8-1/2’’ square (8’’ square finished)
Colorful fabric cut
-
-
-
- 20 x 3-1/4’’ square for the center
- 20 sets of 8 x triangle-ish scraps for the tips of the star
-
-
Background or accent fabric cut
- 160 x 3-1/4’’ squares (eight per block)
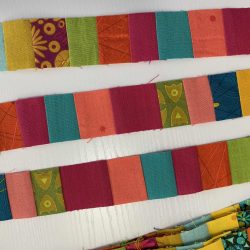
Checkerboard-ish Row
Take strips of random width, sew them together. Iron and cut across into 1-1/2’’ strips. Repeat until you have
two 50-1/2’’ and two 52-1/2’’ strips.
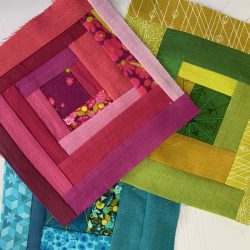
Lopsided Log Cabin (instead of the Squares)
Make 40 blocks à 6-1/2’’ square (6’’ square finished)
Colorful fabric cut
– 40 square-ish pieces somewhat 2- 2-1/2’’
– strips of different width to add around until you can trim the block to 6-1/2’’ square
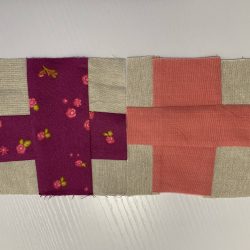
Plus Improv (instead of the Butterflies)
Make 72 blocks à 4-1/2’’ square (4’’ square finished)
Colorful fabric cut
- 144 (72 sets of two) strips app. 2’’ – 2-1/2’’ x 5-1/2’’
Background or accent fabric cut
- 144 (72 sets of two) strips app. 2’’ – 2-1/2’’ x 5-1/2’’
Play with the width! Make the plus-strips skinnier, but rehttps://gaaqg.dev.nsgroupllc.com/wp-content/uploads/2016/01/006-1.jpg to add more to the background strips to ensure that the blocks will be at least 4-1/2’’ square. The more wiggle room you have, the wonkier you can square the blocks.
Background gray borders (same in all three cutting ways) – follow the instructions in the original pattern (page 4).