“Keep your face to the sunshine and you cannot see a shadow.” Helen Keller
How are you?
We are on the homestretch, believe it or not! Well, yes, it’s also a stretch, but this is – ddrrrrumroll: our last row!!! Imagine that!
It’s quite a work intense row, but we’ve done the center star, so we can do everything.
We are doing the butterflies looking for the sun this week, hopefully you have the matching weather and nature wherever you are.
(Photo source: https://butterfly-conservation.org/)

This week’s task
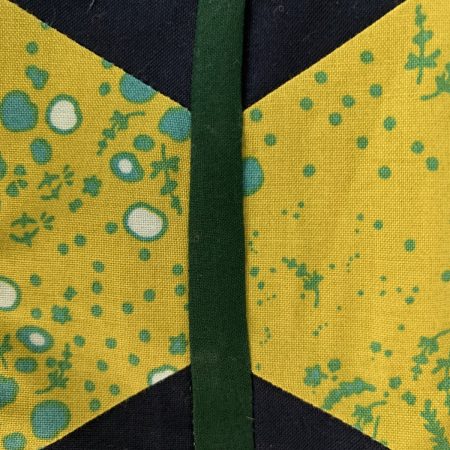
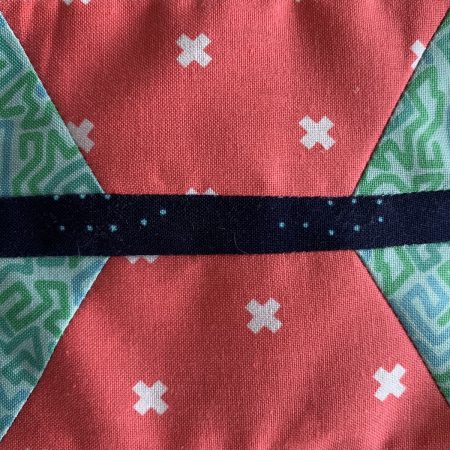 The butterflies each have seven pieces, so the simple math is: We are 504 pieces away from finishing out last pieced border.
If you have solid fabrics or batiks, you don’t need to worry about the 288 little template pieces, you can use them each way. If you have a print, you probably have already cut and separated them in 144 left and 144 right side, directional pieces.
If you have time to keep sewing for a while: Consider building an assembly line set up around your sewing machine, sort the pieces for each step and chain piece your heart out – that will safe a lot of time and unstitching. Plus, for sewing on the second wing (which is the last step for each block), it’s easier to have the skinny middle strip on top of the wing. That way, you can see what you are doing.
The good news: you don’t need to be super overly correct. Little inaccuracies will level out over the long run because you use the blocks alternating horizontally and vertically.
Improv Alternative–Plus Improv (instead of the Butterflies)
You can skip all that measuring, pressuring precision and do it freestyle.
It’s improv, there are no rules! You can do some fun wonky four-patches. Or cross-blocks. Or your favorite block. You can do whatever you want! However: to keep it easy, make sure you make 4-1/2″ square blocks, that will help with the final assembly!
 We chose to make plus-blocks. Here is how:
Make 72 blocks à 4-1/2’’ square (4’’ square finished)
Colorful fabrics cut:
- 144 (72 sets of two) strips app. 2’’ – 2-1/2’’ x 5-1/2’’
Background or accent fabric cut:
- 144 (72 sets of two) strips app. 2’’ – 2-1/2’’ x 5-1/2’’
Play with the width! Make the plus-strips skinnier, but rehttps://gaaqg.dev.nsgroupllc.com/wp-content/uploads/2016/01/006-1.jpg to add more to the background strips to ensure that the blocks will be at least 4-1/2’’ square. The more wiggle room you have, the wonkier you can square the blocks.
What’s next?
Well, it’s pretty exciting, there is no more border-piecing left to do!
Next week, we’ll assemble all the rows around the center (if you haven’t done that already). We’ll have some tips and lessons learned to this topic. Stay tuned, there will be a brand new newsletter coming to you next Sunday.
Meanwhile, you are the ones that make Instagram buzz: Keep posting and chatting on social media, and never forget to use the hashtag #gaaqgqal
Still don’t know how but ready to learn it? Sure thing – find our Instagram slideshow here: Instagram Tutorial
We are still offering the chance to meet your fellow Quilt-Alongers live! Let us know – socialmedia@gaaqg.com, we’re happy to set up a Zoom meeting to hang and chat together!
Have an awesome week,
Nico Laudenberg, Gena Loyd and Nancy Frye
Reach out and connect:
Email: socialmedia@gaaqg.com
Instagram: @gaaqg
Hashtag: #gaaqgqal
Do you still have friends that didn’t join us? No problem, send them this link and they can still register here anytime!